
Gaussian Splatting might sound like a complicated mathematical term, and while the technology behind it certainly is, creating your own “splat” is surprisingly simple. It’s a fantastic way to bring real environments or objects into the digital world with photorealistic quality.
I made a test on https://gs-test.pages.dev/, be sure to check it out! You can move around with the mouse and scroll, or by swiping on your phone.
What is Gaussian Splatting exactly?
Before we dive into the deep end, it’s good to understand what exactly we are making. Traditionally in 3D graphics, we use meshes (made of triangles) or point clouds (individual points).
- Meshes are great for hard surfaces and defined shapes, but struggle with complex details like hair, smoke, or transparency.
- Point clouds can contain a lot of detail, but often look “grainy” when you zoom in; there are gaps between the points.
Gaussian Splatting sits somewhere in between, but on steroids. Instead of hard points, your scene consists of millions of “splats”: 3D ellipsoids (think of stretched spheres) that blend softly into each other. Each splat has a position, rotation, size, color, and transparency.
Why is this cool for the web?
- Photorealism: It captures reflections and details that are almost impossible to recreate with meshes.
- Speed: The rendering technique (rasterization) is lightning fast, allowing you to hit 60fps even on mobile devices.
- Workflow: You don’t have to spend hours modeling. A video is enough to “capture” a scene.
It is a technique that bridges the gap between video and interactive 3D.
In this article, I’ll take you through the flow to get started yourself.
The Basics: Video
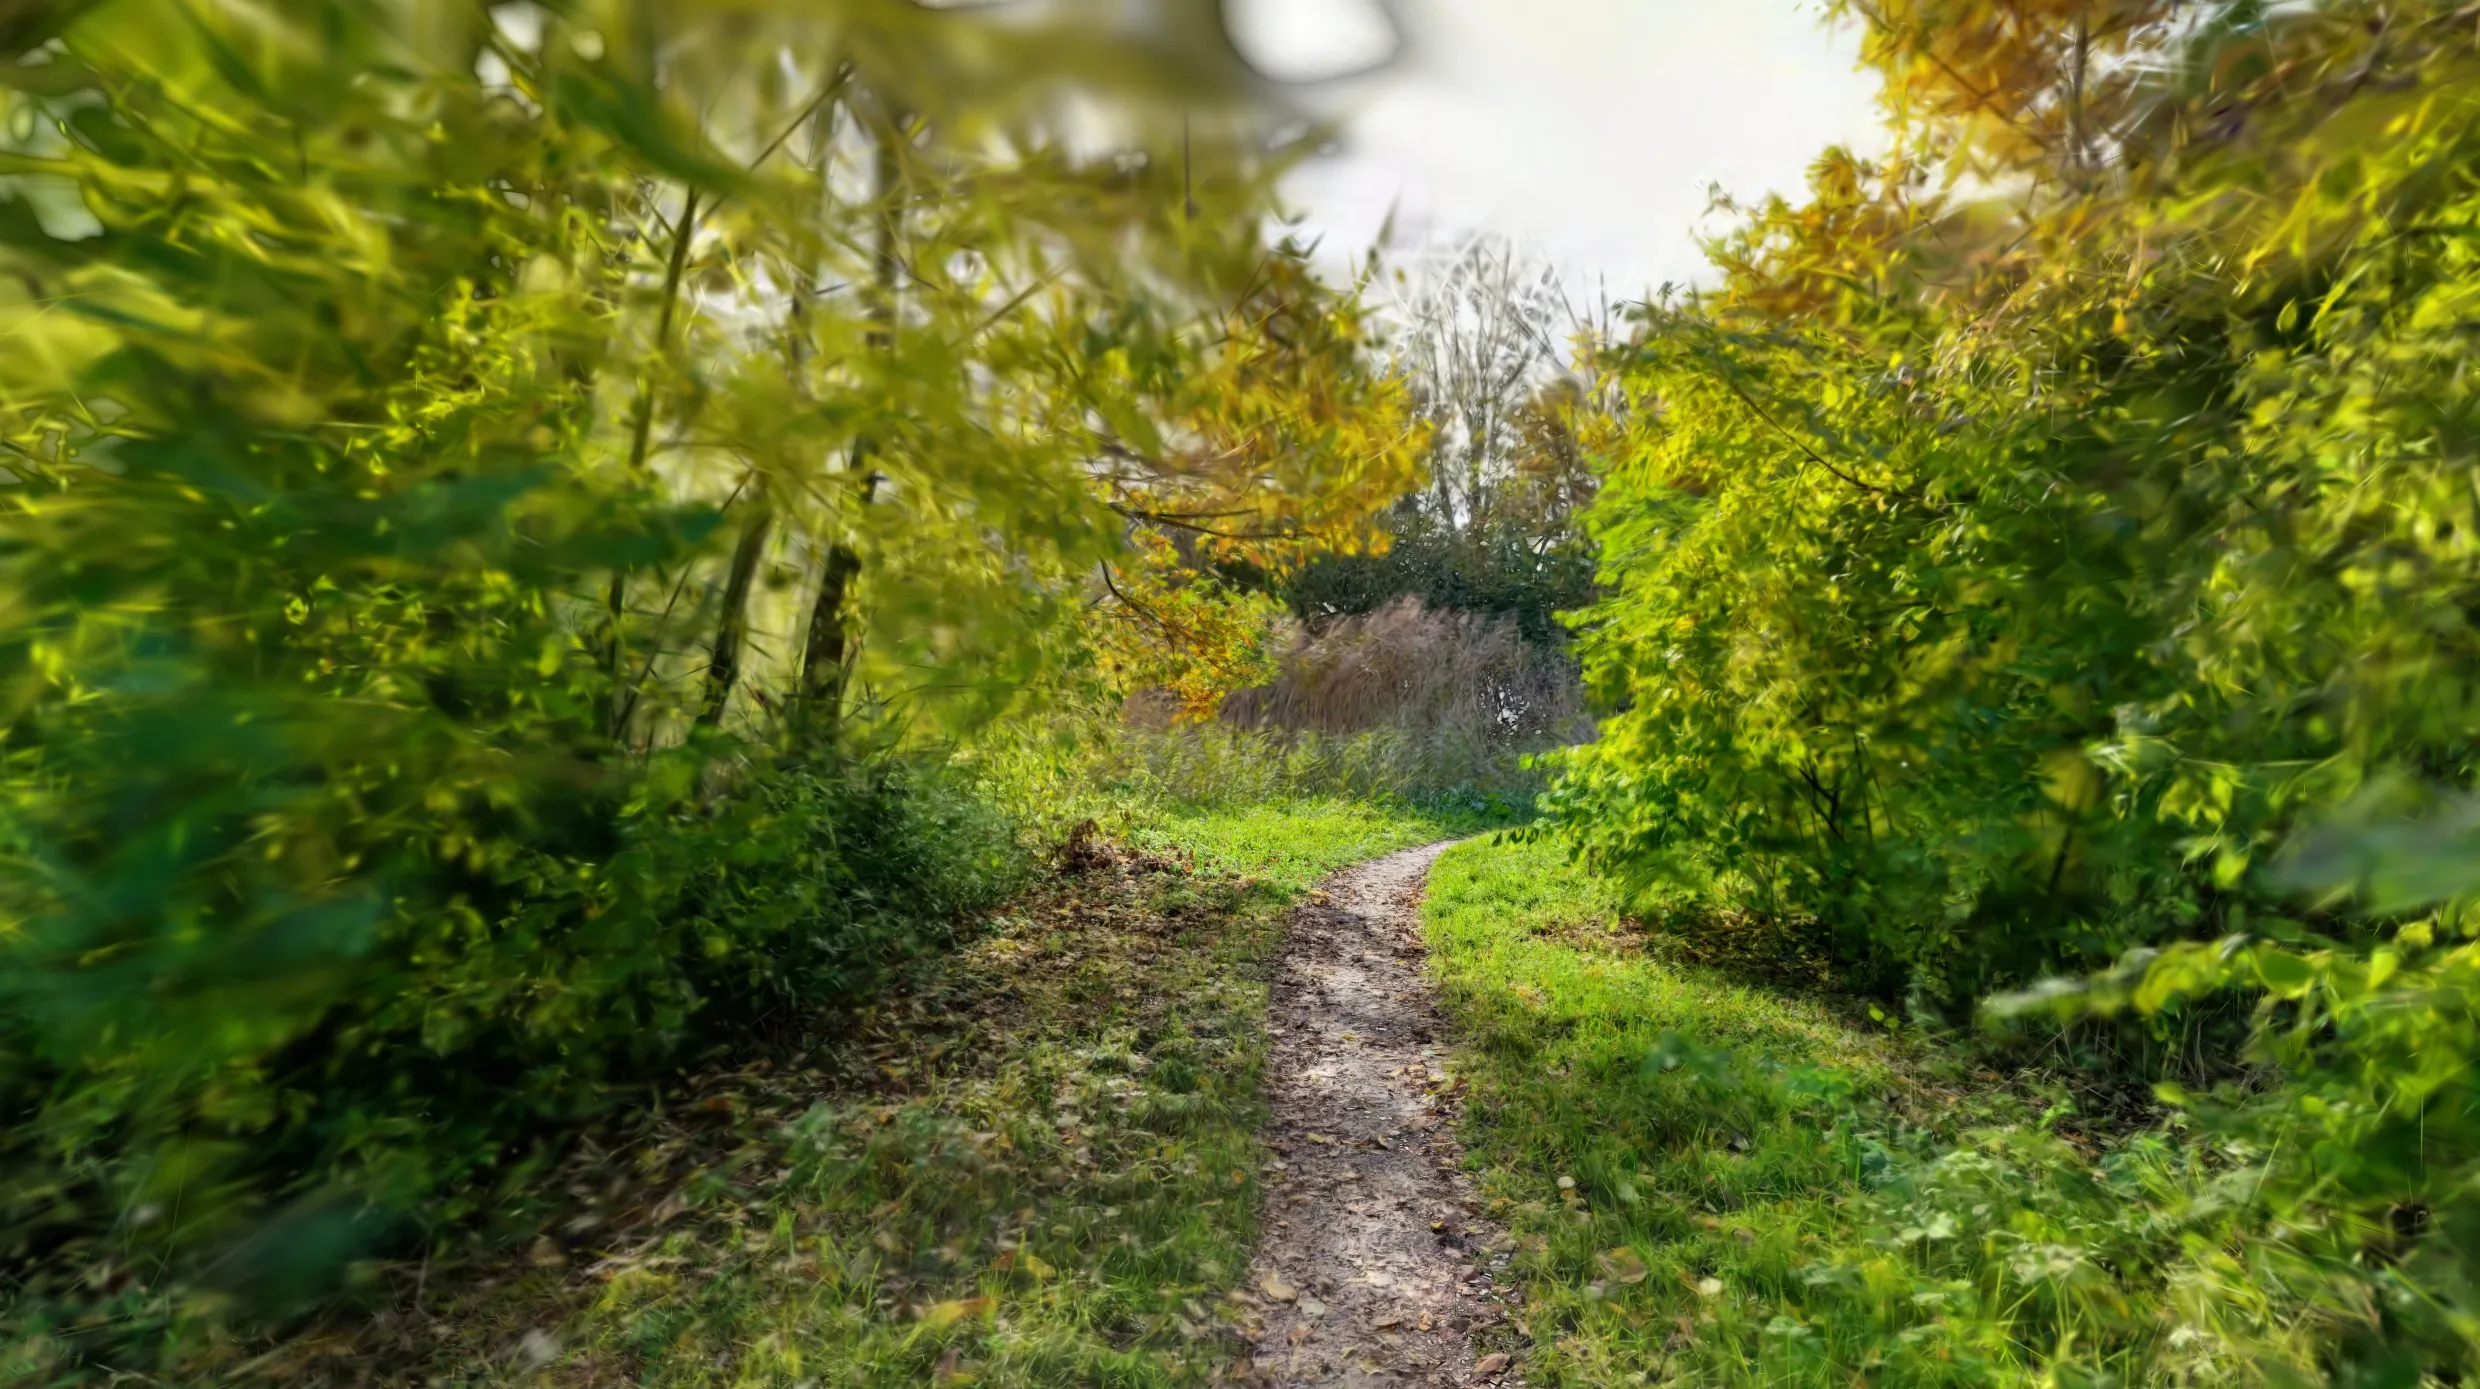
Everything starts with good footage. You need a video of the object or environment you want to capture. Walk around it slowly and make sure you get everything in the frame.
Important tip: Don’t move too fast! If you move too quickly, the software will struggle to find reference points, resulting in a poor reconstruction. Take it easy.
Step 1: From Video to Images
The first technical step is converting your video into a series of individual images. For this, we use ffmpeg, a powerful command-line tool for video editing.
The goal is to get about 300 to 600 images. This provides enough data for a good result without making the processing time extremely long.
Use the following command:
ffmpeg -i video.mp4 -vf "fps=2,scale=iw:ih:flags=lanczos" -c:v mjpeg -q:v 2 -y ./img/frame_%%05d.jpgWhat does this command do?
-i video.mp4: Your input file.fps=2: Extracts 2 frames per second from the video. Adjust this if your video is very short or very long to end up with around 300-600 images.scale=iw:ih: Keeps the original resolution.-q:v 2: Ensures high-quality JPEGs.
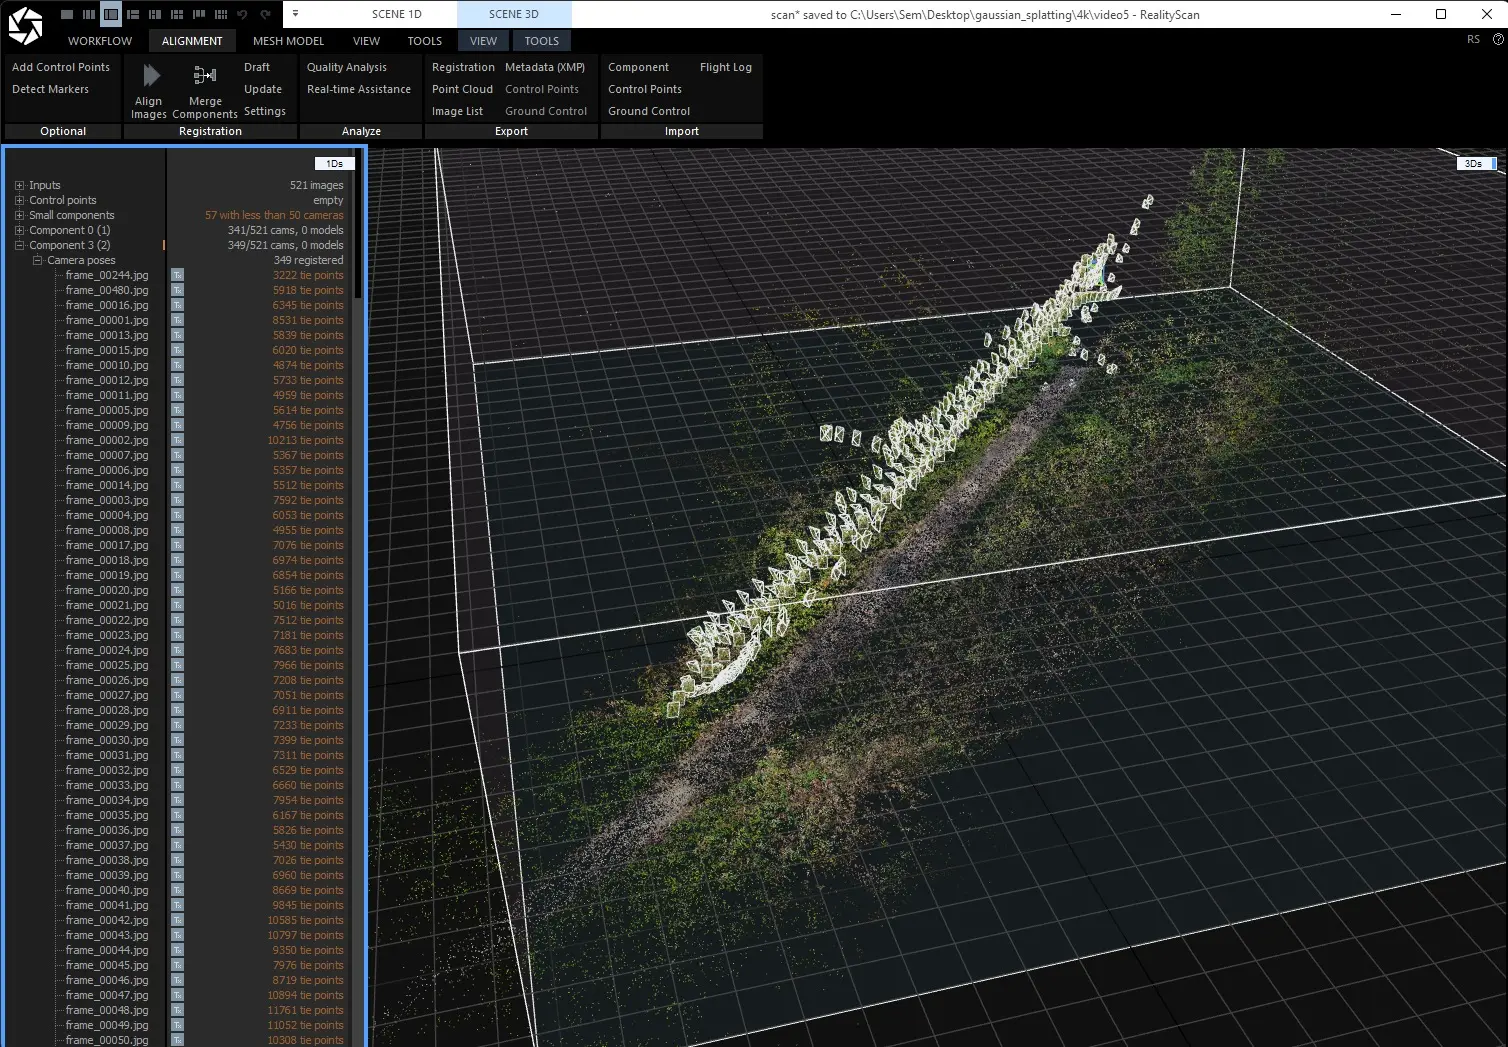
Step 2: Determining Camera Poses
Now that we have the images, we need to know where the camera was for each photo. This is called “camera pose estimation”.
I use RealityScan from Unreal Engine for this. This tool works very fast and is user-friendly. After processing in RealityScan, export the result as a colmap export. Make sure to include both the data and the images.
Step 3: Training with Brush
Now comes the real work: creating the Gaussian Splat. For this, we use Brush, a great tool you can find here: https://github.com/ArthurBrussee/brush.
- Open Brush.
- Load your colmap data.
- Start training.
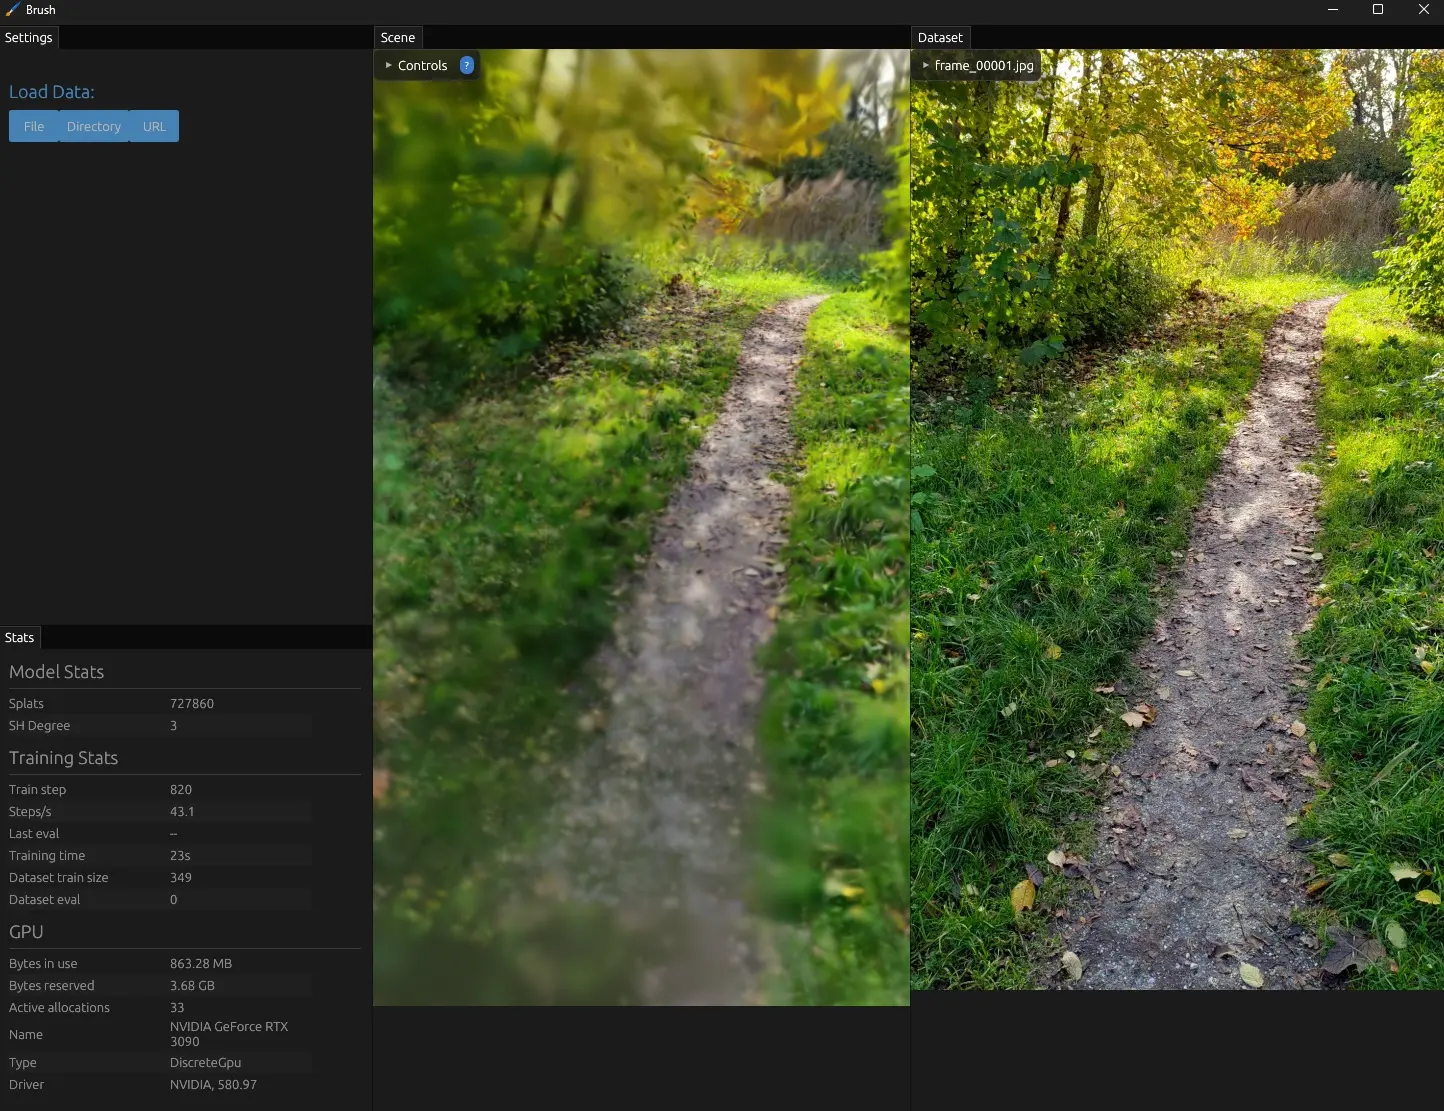
Performance tip: Fewer points mean better performance in the browser. Try to find a balance between quality and the number of points, especially if you want to show it on the web.
Step 4: Compressing
The final step is optimizing your file. The output from Brush is a .ply file, which can be quite large.
To make it suitable for the web, we compress it with Splat transform: https://github.com/playcanvas/splat-transform.
This significantly reduces the file size, making your splat load faster for your visitors.
Conclusion
And that’s it! With these four steps, you can go from a simple video to an impressive 3D representation. The tools are getting better and more accessible, so this is the perfect time to experiment with Gaussian Splatting.
Good luck splatting!